GAR drive management screen
This topic describes the purpose of the GAR drive management screen, how to access it and all the settings and buttons on it.
This feature requires option E3 Drive data/analytics.
The GAR drive management screen allows you to view and approve your uploaded drive data files for your GAR units, scanners and phones. When a drive data file is approved it is then available to use in analyses such as the cell footprint analysis, WiFi footprint analysis and the snapshot analysis.
NOTE: If you do not approve your uploaded drive data file using this screen your drive data files do not display in the Cell footprint analysis, WiFi footprint analysis and Snapshot GAR analysis dialog boxes.
This screen also allows you to view and control your GAR data collection.
For further information on approving drive data files refer to To approve a drive data file.
-
On the main menu click Other links then Manage GAR drive data. The GAR drive management screen opens on a new browser tab.
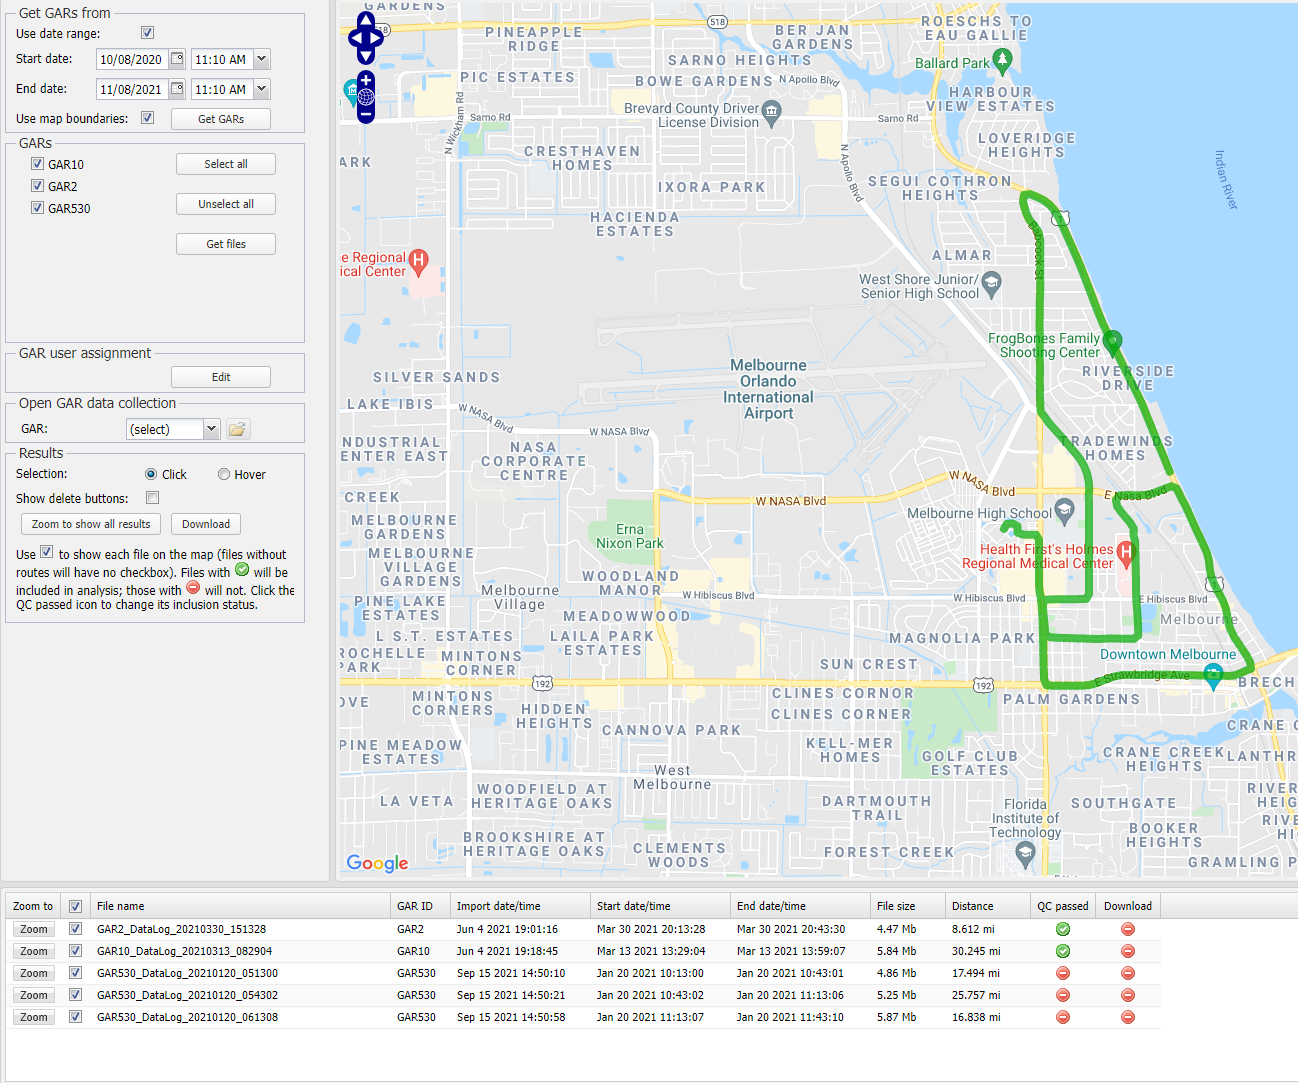
The Filter panel, located at the left of the screen, consists of the following sections:
This allows you to select the criteria for the GARs you want to manage, based on the time period of interest and/or the map boundaries.
Using this information it filters and displays the GAR units that performed drives for your selected criteria.
Click to display in GARs all the GAR units that performed drives during the selected time period.
This setting is mandatory. Select the earliest date you want used to filter the GAR units that performed drives. This setting is automatically completed with the date and time one month prior to the current date and time. If you want to change the start date and time you can use the date and time pickers to enter the details, or you can enter them manually. If you enter them manually note that the date format used is month/day/year. This date along with the End date are used to retrieve the GAR units used during the specified time interval.
This setting is mandatory. Select the latest date you want used to filter the GAR units that performed drives. This setting is automatically completed with the current date and time. If you want to change the end date and time you can use the date and time pickers to enter the details, or you can enter them manually. If you enter them manually note that the date format used is month/day/year. This date along with the Start date are used to retrieve the GAR units used during the specified time interval.
Click to display in GARs all the GAR units that performed drives only within the selected map boundaries.
This allows you to select the GAR units you are interested in validating drive files for and to retrieve the drive data files. If a device is titled as Unknown then it is either a GAR unit that is of an older format, a phone or a scanner. Typically you would select the GAR units you use.
Click to select all the GAR units listed. All the check boxes are updated to show they are selected.
Click to remove all the selected the GAR units. All the check boxes are cleared.
Click to retrieve all the drive data files for the GAR units you have selected. The files are then displayed on the Files panel.
This allows you to assign a user to a GAR unit.
Click to assign a user to a GAR unit. The GAR user assignment dialog box opens. When a user is assigned to a GAR unit they receive email messages when the file conversion is complete on any drive files created on the GAR unit.
This allows you to open the GAR data collection screen for the selected GAR unit. The GAR data collection screen opens on a separate browser tab. This screen allows you to view the data collection, start and stop the data collection and edit the data collection settings. For further information on the GAR data collection screen refer to the GAR User's Guide.

Select the GAR unit you want to open the GAR data collection screen for then click .
The main purpose of this section is to allow you to select how the results are selected on the Map panel and Files panel.
This setting effects both the Map panel and Files panel. Select:
- Click: if you want to click:
- on the drive route on the map for it to highlight the respective file on the Files panel. This is the setting recommended for this task.
- on the file on the Files panel for it to highlight the respective route on the map.
- Hover: if you want to hover:
- over the drive route on the map for it to highlight the respective file on the Files panel. This is the setting recommended for this task.
- over the file on the Files panel for it to highlight the respective route on the map.
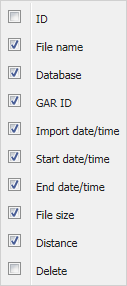
Select if you want to display the Delete column on the Files panel.
Click to display all the drive routes associated with your selected date range and GAR units.
The Map panel, located in the center of the screen is the area that displays the drive routes. The map also has base layer selection settings and map controls.

Click on the arrows to pan across the map. For further information refer to Panning across the map.

Click on + or - to zoom in an out of the map. For further information refer to Zooming into the map.

Click to open a panel which allows you to select which base map layers you want displayed. The base layers available to select are: Google Physical, Google Streets, Google Hybrid (a combination of both satellite and street maps) and Google Satellite.
The Files panel, located at the bottom of the screen, lists all the files associated with your selected date range and GAR units.
Click Zoom to center the selected drive data file's physical route on the map. Note, for drive routes with a distance of zero miles no Zoom button is displayed.
When this check box is:
- selected: the drive route for the file is displayed on the map.
- clear: the drive route for the file is not displayed on the map.
Note, for drive routes with a distance of zero miles no check box is displayed.
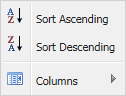
This column is not displayed by default. To display it use the sorting and column menu. This identifier is used by Gladiator Forensicsfor support and debugging purposes.
Displays the drive data file name.
Displays the database the GAR unit was assigned to and where the file was imported to.
Displays the name of the GAR unit that collected the drive data. If a GAR unit is titled as Unknown then it is either a GAR unit that is of an older format, a phone or a scanner.
Displays the date and time that the drive data file was imported into OSS-ESPA.
Displays the date and time that data was first collected in the drive data file.
Displays the date and time that data was last collected in the drive data file.
Displays the size of the drive data file.
Displays the distance in miles covered by the drive data file.
Click the icon to approve the drive data file for use in analysis. Once approved the drive data file is available to select in analyses such as the Cell footprint analysis dialog box.
This column is not displayed by default. To display it use either Show delete buttons or the sorting and column menu. Click to delete the drive data file from displaying on the GAR drive management screen. For further information on deleting drive data files refer to Managing drive data files.
Click the icon to select the drive data file for downloading, then click Download. This allows you to download the files in .txt or .csv format. You can select all the files you require and they are downloaded in one .zip file, with the individual file names as .zip files within it.